Post Tension
31/12/2023 Share :
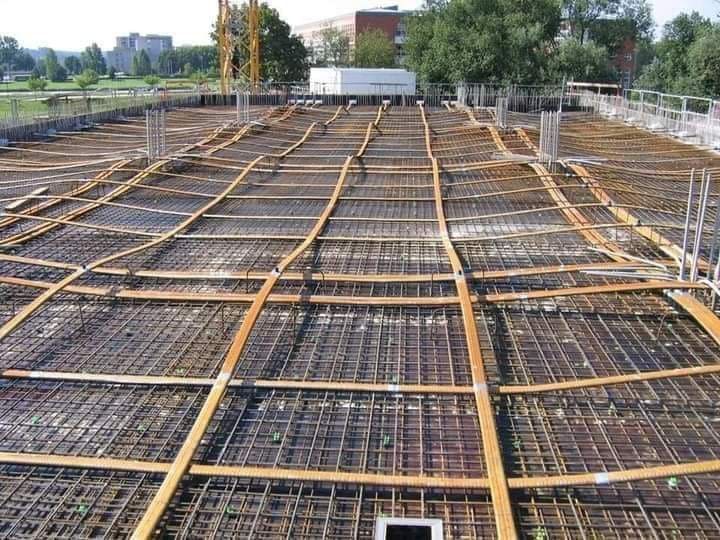
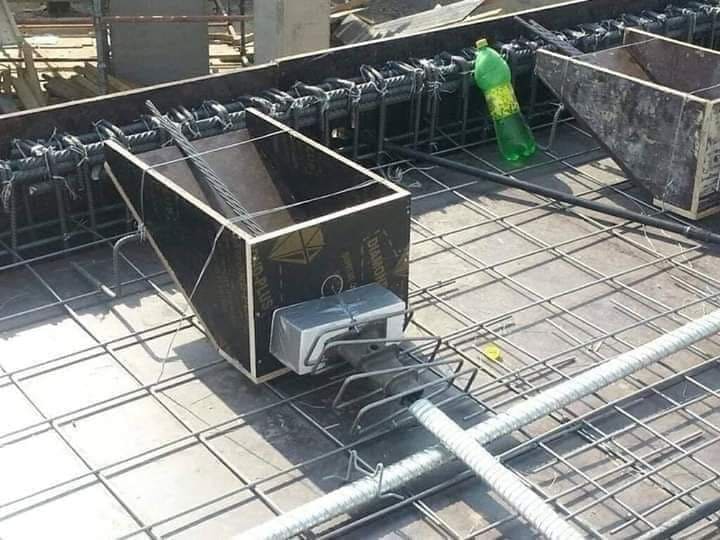
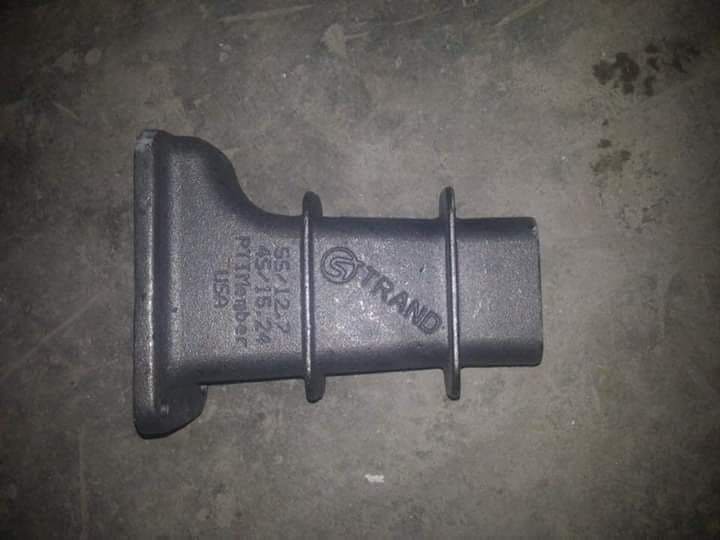
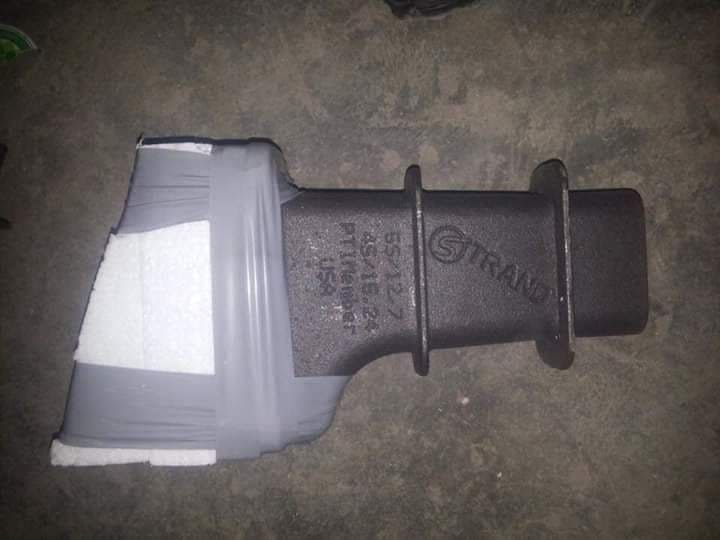
Lec. Dr. Riyadh Abd Al-Abbas<br />Post tension ceilings are one of the important ceilings that rely on a beamless ceiling system. They also work to reduce the percentage of iron and can withstand wide seas... up to 60 metres.<br />Post Tension Ingredients: Post Tension Slab<br />1- Al-Weirat (Strand)<br />2- Ducts<br />3- Chairs designated for maids<br />4- Atari<br />This is the general configuration...<br /><br />The detailed composition of each unit mentioned is as follows:<br />First: Wires: They are considered the main factor in the formation of post tension tiles, and they are the ones that can withstand tension, as the wires are made of (nickel and steel) and therefore they are stronger than regular rebar.<br />As for the wires, they are cut on site by specialized workers... and we place them in two directions: the wires in the X direction... and the other in the Y direction.<br />This is after the surveyor determines and marks some of the x-axes as well as some of the y-axes of the building, and he does not determine all the points. So we take those signed points as if they were a rope through which we sign the rest of the points in succession. Therefore, we find immediately afterwards that the specialist worker determines the remaining points from the dimension board on the Paint directly using marker pens or spray<br />Technical note: The color of the spray in the x direction is different from the color of the spray in the y direction, as shown in the pictures to prevent error “Photo No. 1”<br /><br />- The terminal ends of the strands<br />As for the peripheral ends of the Werat, they stop at the Werat Sea... so that:<br />1- If the wire sea is 30 meters or less, then the ends of the wire are a dead line and a live line.<br />2- If the wire sea is larger than 30 metres, both ends of the wire will be live (live line).<br /><br />As for the dead end: it is a knot that resembles an onion, using a machine specializing in making onion knots, and it is fixed at the end of the slab or in the concrete walls supporting the building.. “Photo No. 2”<br />Knowing that the length of the wires emerging from the bag to the knots does not exceed 1.20 meters or the length of a link.<br /><br />As for the live end (Photo No. 3), it is an extended wire through which tension is made at a certain value according to the instructions of the consulting engineer. It consists of:<br />1-Anchor cast<br />(The palm): It is a block of iron to pass the wires inside. It is attached with a “checkerboard” adhesive tape to the pouch so that no concrete gets inside. Sometimes a piece of clay is placed to also prevent the entry of cement butter or something similar inside the pouch so that we can tighten the wires after that without hindrance. .. “Picture No. 4”<br />2-Anchor block<br />(The comb): It is an iron block with a group of holes through which the hairs can pass through, and it is installed inside the palm.. “Photo No. 5”<br />3- Wedges<br />(Nooses): They are used to tighten the lock on the wires after completing the tightening process. The wires are two halves in a cone shape and are connected by a rubber band. “Photo No. 6”<br /><br />4- A piece of cork foam: It is placed over the above-mentioned parts to prevent the concrete from adhering to the blocks and to prevent any blockage of the places where weeds exit from the blocks.<br /><br />The final appearance will be as shown in “Photo No. 7”.<br /><br />secondly :<br />Ducts: These are aluminum or sheet pouches. We collect the wires inside these pouches. If the pouch does not cover the sea of wire, a connection is made with another pouch, and one of the pouches is split and the other is inserted into it, with an adhesive tape placed at the connection point to prevent any concrete from entering. Or concrete foam inside the case so that it does not affect the wires while tightening them..<br />If the number of wires = only one wire, we do not insert it into a bag, but rather it is placed inside a hose as shown in “Picture No. 8”<br />This is because we are very careful not to get any cement slurry inside the bag, because only one wire will occupy a very small space inside the bag that could allow concrete to enter.<br />We place hoses at the beginning and end of all wires (Photo No. 9) so that the wires are injected after tightening with certain materials such as Sika grout, which is a material that gives high rigidity to stabilize the wires inside the case after tightening.<br />NB :<br />These hoses are also covered with adhesive or clay before pouring so that concrete butter does not penetrate them, negatively affecting the tension of the wires.<br /><br />Third :<br />Chairs designated for wires: This word was mentioned because there are chairs designated for the iron network to lift the upper iron..<br />As for the wire chairs, they are used to lift the wires according to the loads as required in the board. They are high at the columns and relatively low in the middle of the sea... that is, they go with the direction of the moment.<br /><br />Baneen Alammar, [12/30/2023 06:58 PM]<br />The chairs are made by the blacksmith under the supervision of the Weirat workers, who give him the required dimensions based on the heights and number of the chairs. The specialized workers stack them, but the blacksmith attaches them with nails to the bracket, whether metal or wooden. Pieces of plastic are placed in the legs of the chairs so that rust does not reach them after removing the bracket.<br /><br />Note: The painting contains the locations of all the chairs, as well as the different heights of all the chairs as well..<br /><br />Fourthly:<br />Cans: They are spiral shaped cans (Photo No. 10) that are made by the blacksmiths on the site. One can is placed at the beginning of the wairat and another is placed at the end... for all the wairat of different seas and numbers. The goal of that can is to preserve the concrete and the concrete structure. After the casting process, it does not cause cracks, dents, or the like during the process of tightening the wires using the tensioning machine.<br />Rebar:<br />The reinforcing steel in this type of slab is simple because the post tension wires bear more tension than the steel.<br />The iron consists of two grids: one lower and one upper, and each grid consists of two iron lungs, a brush lung and a covering lung. This is located on the rebar plate.<br />The organizational framework for the work is as follows: The lower iron network (brushes and covers) is placed, after which the wires of the post tension are extended in its various directions, and then the upper iron network is placed, taking into account the arrangement and organization of the work between the various industrialists and technicians on the site so that no error occurs, God forbid.<br /><br />A practical example of a post-tension slab “Summary of the above”:<br /><br />First, the points are signed on the intensity by the surveyor, in both directions (x, y), and after signing them, those points are captured as main points, "like a rubber", and the rest of the points are signed with spray. After that, we wait for the blacksmith to work to place the lower iron mesh, and immediately after that, the Wirat workers extend Werets in the x - y directions<br />Taking into account that if the wire extends more than 30 metres, we make two ends, which are to be present in it (Anchor Block - Anchor Cast - Al-Zanaqat - Al-Fil), and the wires are stretched through it to be tightened after pouring... If the sea of wire will not exceed 30 metres, we By making a live end and a dead end, the dead end is in the form of a bulbous knot, which is made with a specific machine as shown in the pictures. If the sea is very large and one pouch cannot cover all that length, we insert another pouch into it by cutting one of the two pouches and inserting the other into it and tying them well. Checkerboard adhesive tape...<br />It is very important to place a spiral-shaped container at the first end of the wire, and another spiral-shaped container as well. Its mission is to preserve the body of the concrete during the process of tightening the wires so that the concrete body is not affected by this tightening process. In each case, we place a part of an electrical hose at the beginning and end and it is inserted into the case. Seal it tightly inside the bag using clay and checkerboard<br />After that, the blacksmith makes the upper iron mesh, and once he finishes it, the consultant takes over all the work. The slab is poured using a pump or stationary pump in the event that the building’s height is very large.<br />After pouring for a certain period determined by the consultant, or after the concrete stress reaches 80%, we tighten the wires using: iron cable tensioning machine..<br /><br />After the tension is completed - immediately - for each wire separately, we put one clamp on it to complete the process of fixing it after tightening, and as we mentioned previously, we put a few connections from the electrical hoses at the beginning and last of the wires... Now comes its turn: we pour through it the “grout” material, which is similar to it. With a mixture of cement with a high percentage of water... it is poured from one of the hoses and passes inside the pod until it emerges from the other end of the pod through the part of the previously placed electrical hose... which also confirms the process of installing the wires after tightening them... As for the ends of the live wires coming out, we cut them. After completing the tightening process<br /><br />There is an important note, which is: How to tighten the wererat if its sea exceeds 30 meters and it has two live limbs?<br />- We tighten each end separately, keeping in mind that we put springs on the other end, which we do not tighten, so that no displacement occurs, but rather an elongation of the wire itself.